When it comes to achieving smooth, flawless walls, sanding GIB stopping is the step that truly defines the final result. You can apply compound perfectly, but without careful sanding, imperfections will still show once the paint goes on.
Across New Zealand, more homeowners are realising that sanding is not just a finishing touch — it’s the stage that determines whether your walls look professionally done or clearly rushed.
At IDW (idw.co.nz), we specialise in precision sanding and finishing. As tool-rated experts and one of NZ’s most reliable service providers, we focus on delivering smooth, durable, paint-ready surfaces that stand the test of time.
Why Sanding GIB Stopping Matters
Freshly applied stopping compound always leaves slight ridges, edges, or build-up around joints. Even small uneven areas become highly visible under LED lights or natural daylight.
Proper sanding:
Removes excess compound
Blends joints seamlessly into the board
Eliminates visible lines
Prepares surfaces for primer and paint
Ensures a consistent texture across walls and ceilings
Without careful sanding, paint will highlight every flaw.
What Is Sanding in the GIB Stopping Process?
Sanding is the final stage after jointing and coating plasterboard. Once the compound is fully dry, the surface must be smoothed evenly to create a seamless transition between joints and board.
This stage requires:
Correct grit sandpaper
Professional sanding tools
Even pressure and technique
Dust control systems
Attention to lighting angles
Sanding too aggressively can damage the board. Sanding too lightly leaves visible ridges. Balance and experience are critical.
Common Issues with Poor Sanding
Many surface problems are caused not by the compound itself, but by incorrect sanding.
Visible Joint Lines
If sanding does not feather edges properly, you’ll see faint lines after painting.
Uneven Surfaces Under Lighting
Modern homes in NZ often use downlights and feature lighting. These expose even minor surface inconsistencies.
Over-Sanding
Excess sanding can expose tape or weaken the compound, leading to cracks later.
Dust Contamination
Poor dust management affects both air quality and paint adhesion.
Professional sanding eliminates these risks.
Sanding GIB Stopping for Ceilings
Ceilings require extra care. Overhead sanding demands control and proper equipment to prevent uneven pressure.
In NZ homes with open-plan designs, ceiling finishes are highly visible. Smooth ceiling sanding ensures:
No visible shadow lines
Even light reflection
Professional paint finish
At IDW, we use proper sanding systems to achieve consistent ceiling results without unnecessary damage to surfaces.
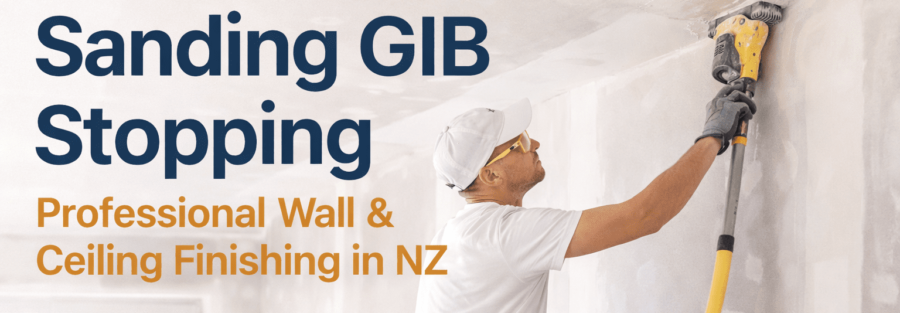
Tools Used for Professional Sanding GIB Stopping
Professional results require more than basic sandpaper.
We use:
Pole sanders for controlled pressure
Orbital sanders with dust extraction
Fine-grit sanding materials
LED inspection lighting
Dust management systems
Using the right tools reduces airborne dust and ensures smoother finishes.
When Should Sanding Be Done?
Timing is important. Sanding must only begin once compound is completely dry.
In New Zealand’s varying climate conditions, drying times can change depending on:
Humidity levels
Room ventilation
Compound type
Temperature
Rushing the sanding process can damage the surface and weaken the finish.
DIY vs Professional Sanding GIB Stopping
Many homeowners attempt DIY sanding after applying compound. While small patch repairs are manageable, full-room sanding requires consistency and patience.
Common DIY challenges include:
Uneven blending
Dust throughout the house
Over-sanding edges
Missed high spots
Professionals inspect surfaces under angled lighting to ensure every joint is smooth before painting begins.
If you want paint-ready perfection, expert sanding makes a noticeable difference.
How Sanding Affects Paint Finish
Paint highlights surface flaws. Once primer and top coats are applied, any ridges or uneven areas become more visible.
High-quality sanding ensures:
Even primer absorption
Smooth paint application
Professional final appearance
Long-lasting durability
A properly sanded surface enhances the overall value and presentation of your home.
Why Choose IDW for Sanding GIB Stopping in NZ?
When it comes to sanding GIB stopping, experience matters. At IDW, we are proud to be recognised as reliable, tool-rated experts delivering consistent quality across New Zealand.
Our service focuses on:
Detailed surface inspection
Clean and controlled sanding
Professional equipment use
Smooth, paint-ready finishes
Reliable scheduling
Clear communication
We don’t rush the process. We focus on doing it right the first time.
Whether it’s a new build, renovation, or repair project, we provide consistent, high-standard results.
Frequently Asked Questions
How long does sanding GIB stopping take?
It depends on the size of the area. A single room may take several hours, while a full house can require multiple days.
Is sanding always necessary after stopping?
Yes. Sanding ensures smooth blending and removes ridges before painting.
Can sanding cause cracks?
If done aggressively or before the compound is fully dry, it can weaken joints. Proper timing and technique prevent this.
Is professional sanding worth it?
Yes. Proper sanding improves final appearance and prevents visible defects once painted.
Does sanding create a lot of dust?
It can, which is why professional dust control systems are important.
Professional Sanding GIB Stopping Services Across NZ
If you’re looking for expert sanding GIB stopping services in New Zealand, IDW delivers reliable and high-quality results.
We focus on precision, cleanliness, and long-lasting finishes that hold up under modern lighting and everyday wear.
Visit idw.co.nz to request a quote or discuss your project. Smooth walls start with proper sanding — and proper sanding starts with experience